
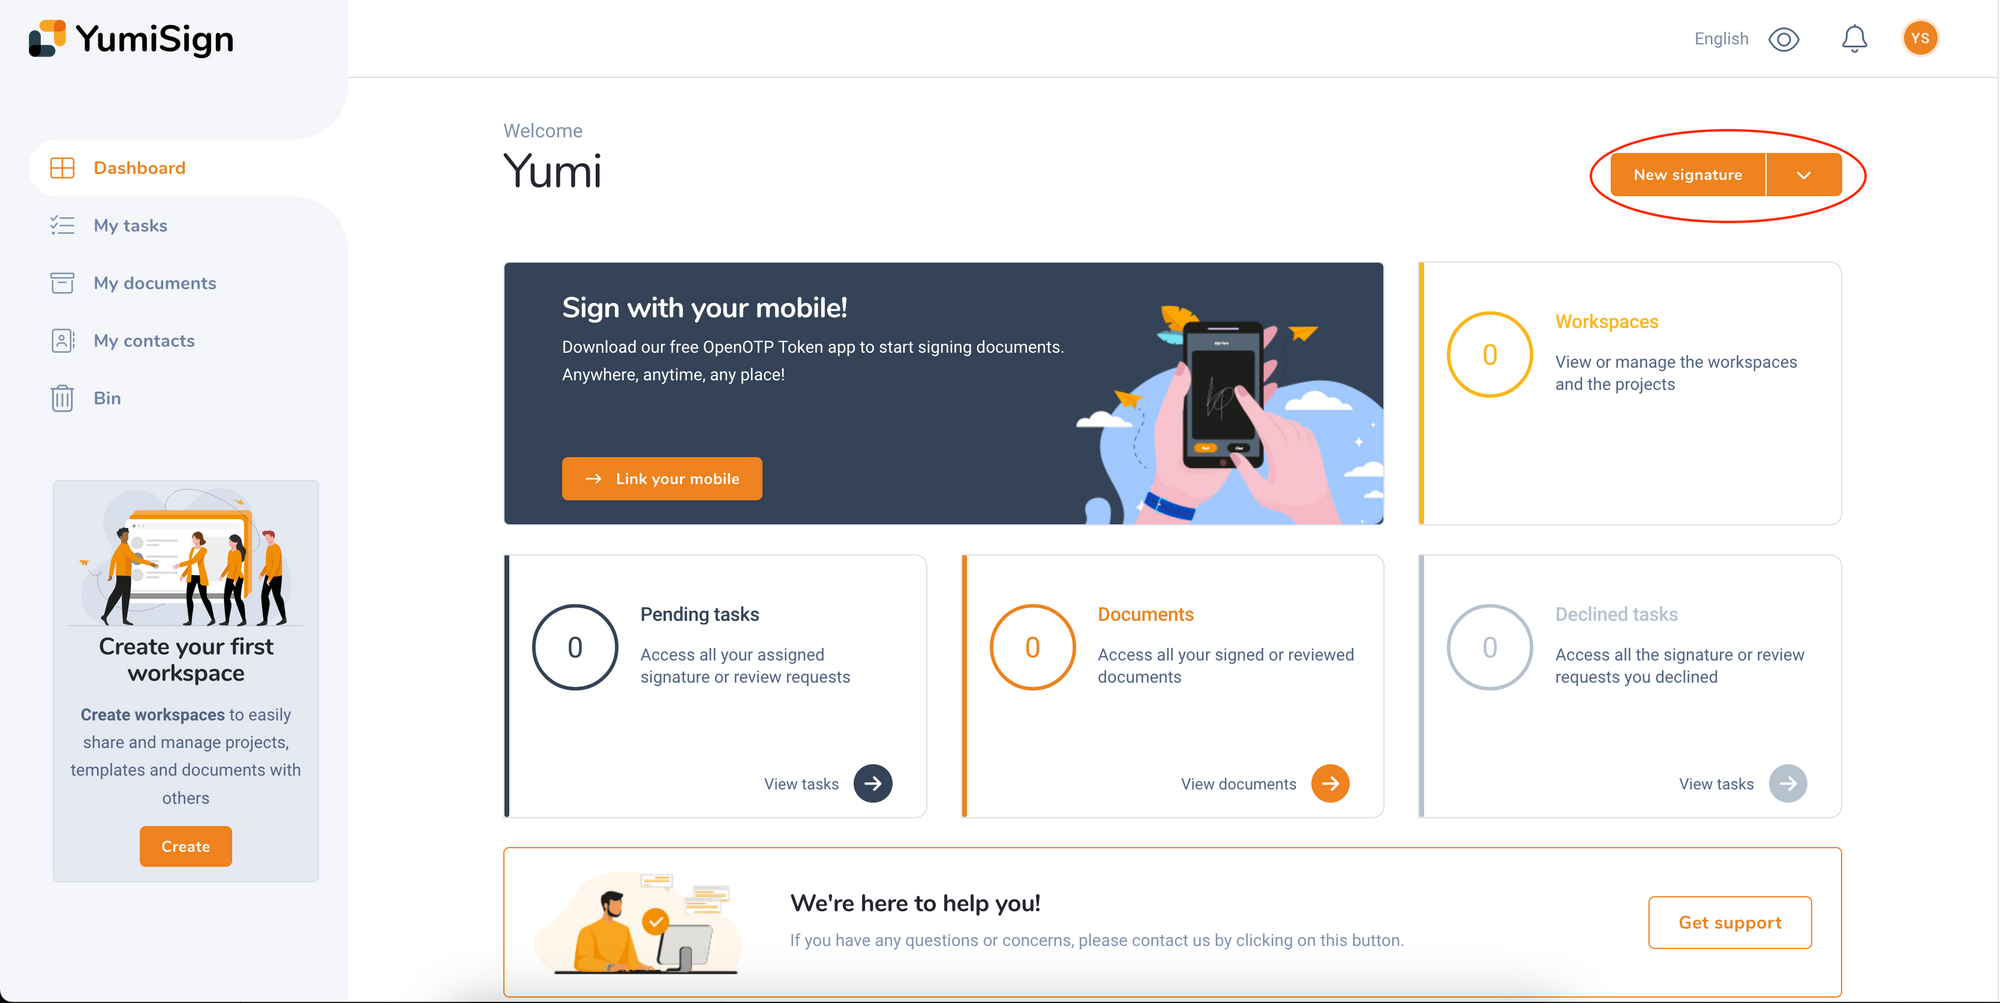
From your dashboard, click on "New Signature" on the top right corner:
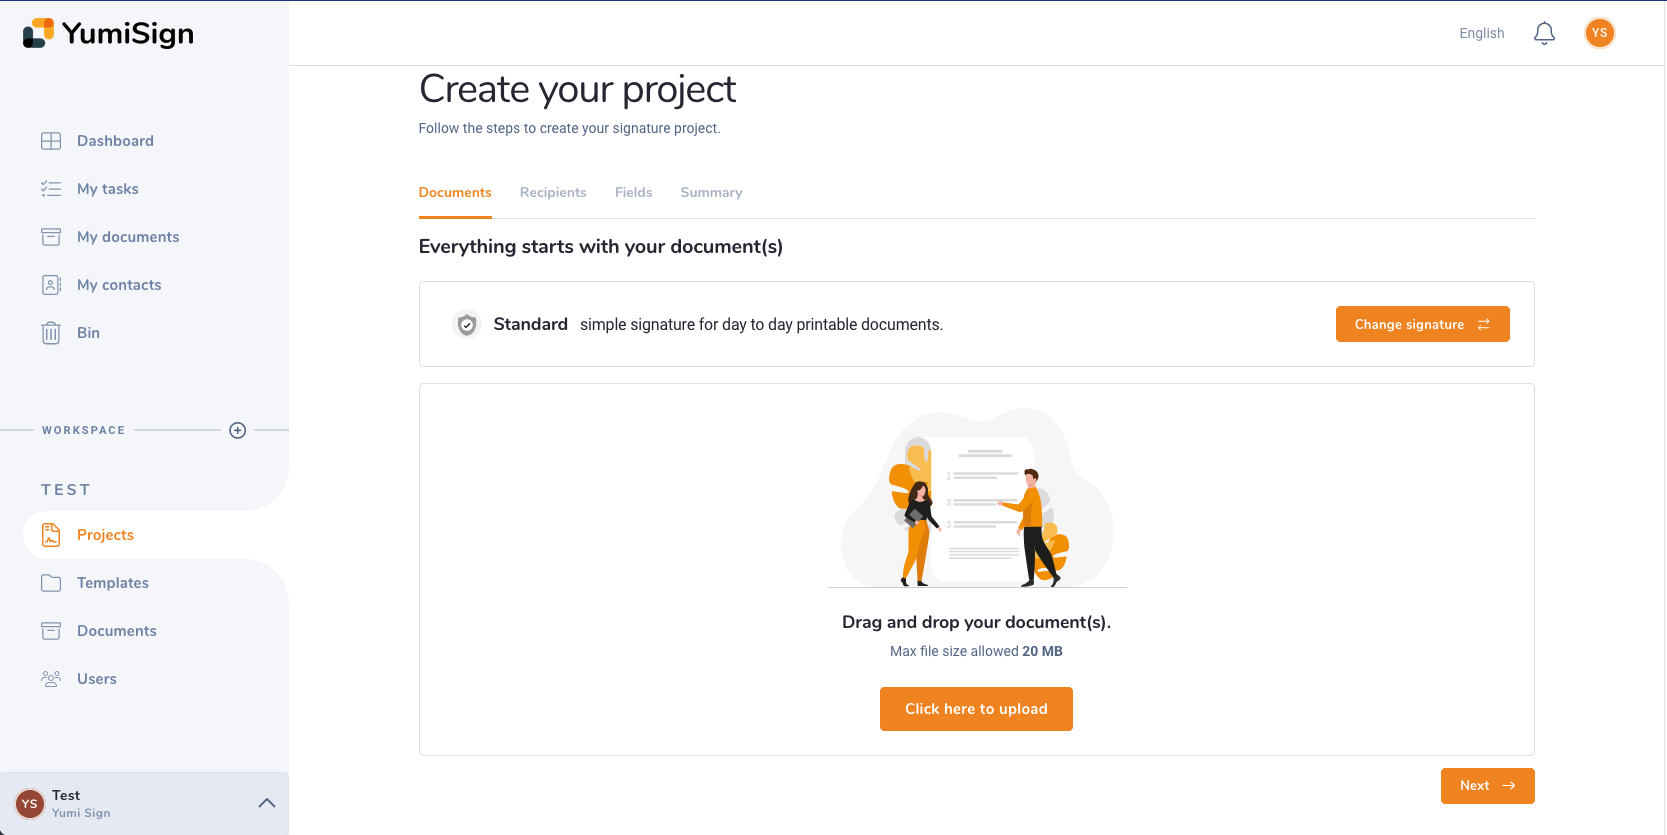
On the next screen, click on the "Click here to upload" button to select a file from your computer. YumiSign supports PDFs, images and usual word-processors files (more information here):
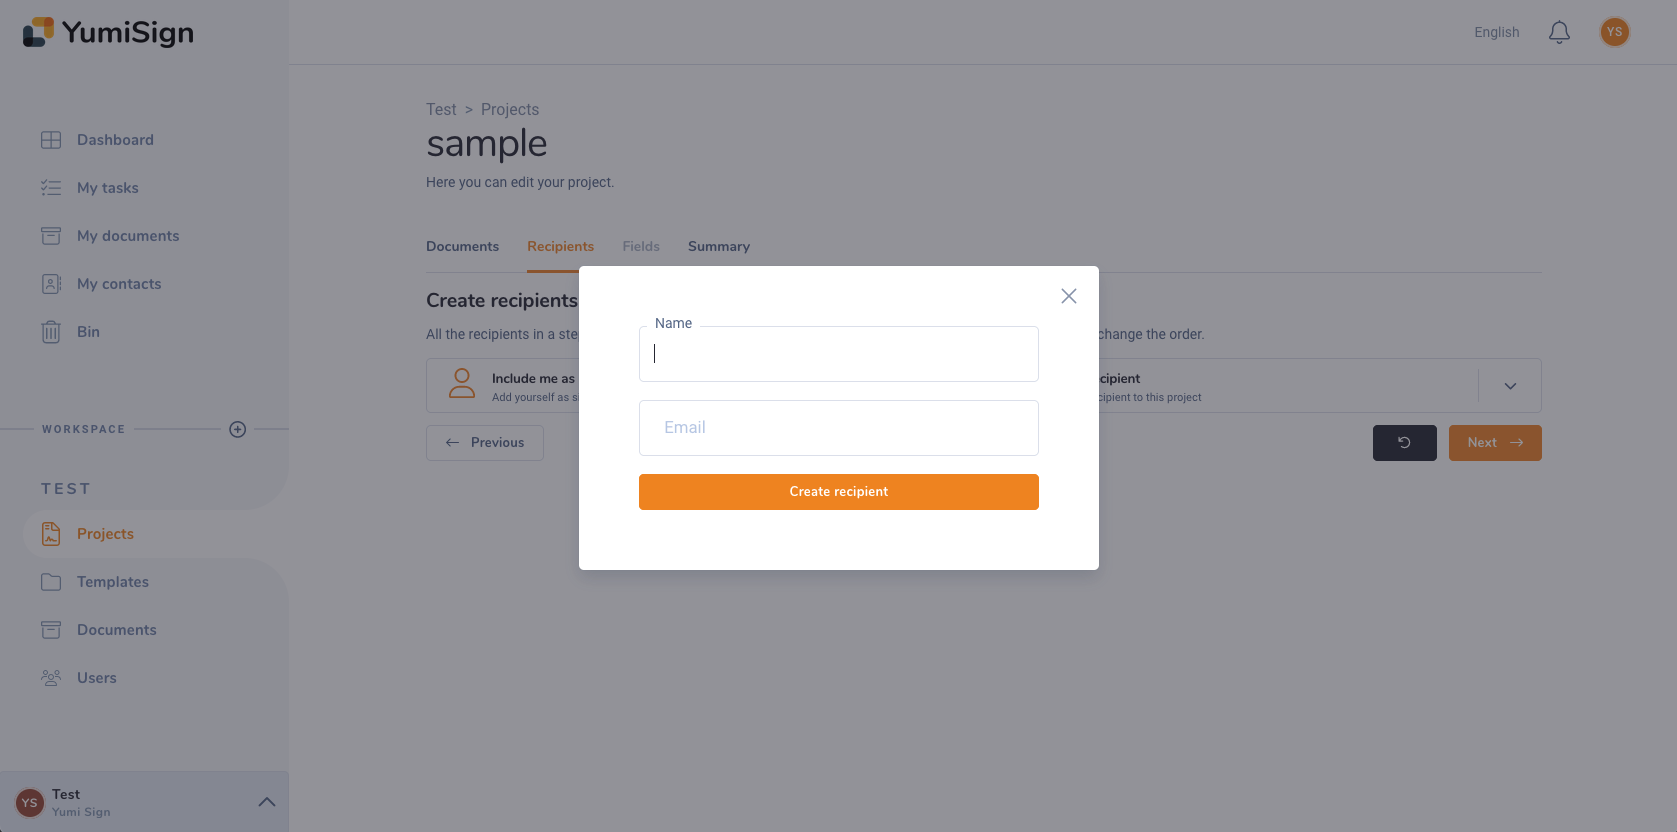
Then, click "next" to add some recipients. Click on "New Recipient", and fill your recipient information:
Click on "next" to discover the document designer: this is the page where you can set fields to be filled by your signatories:
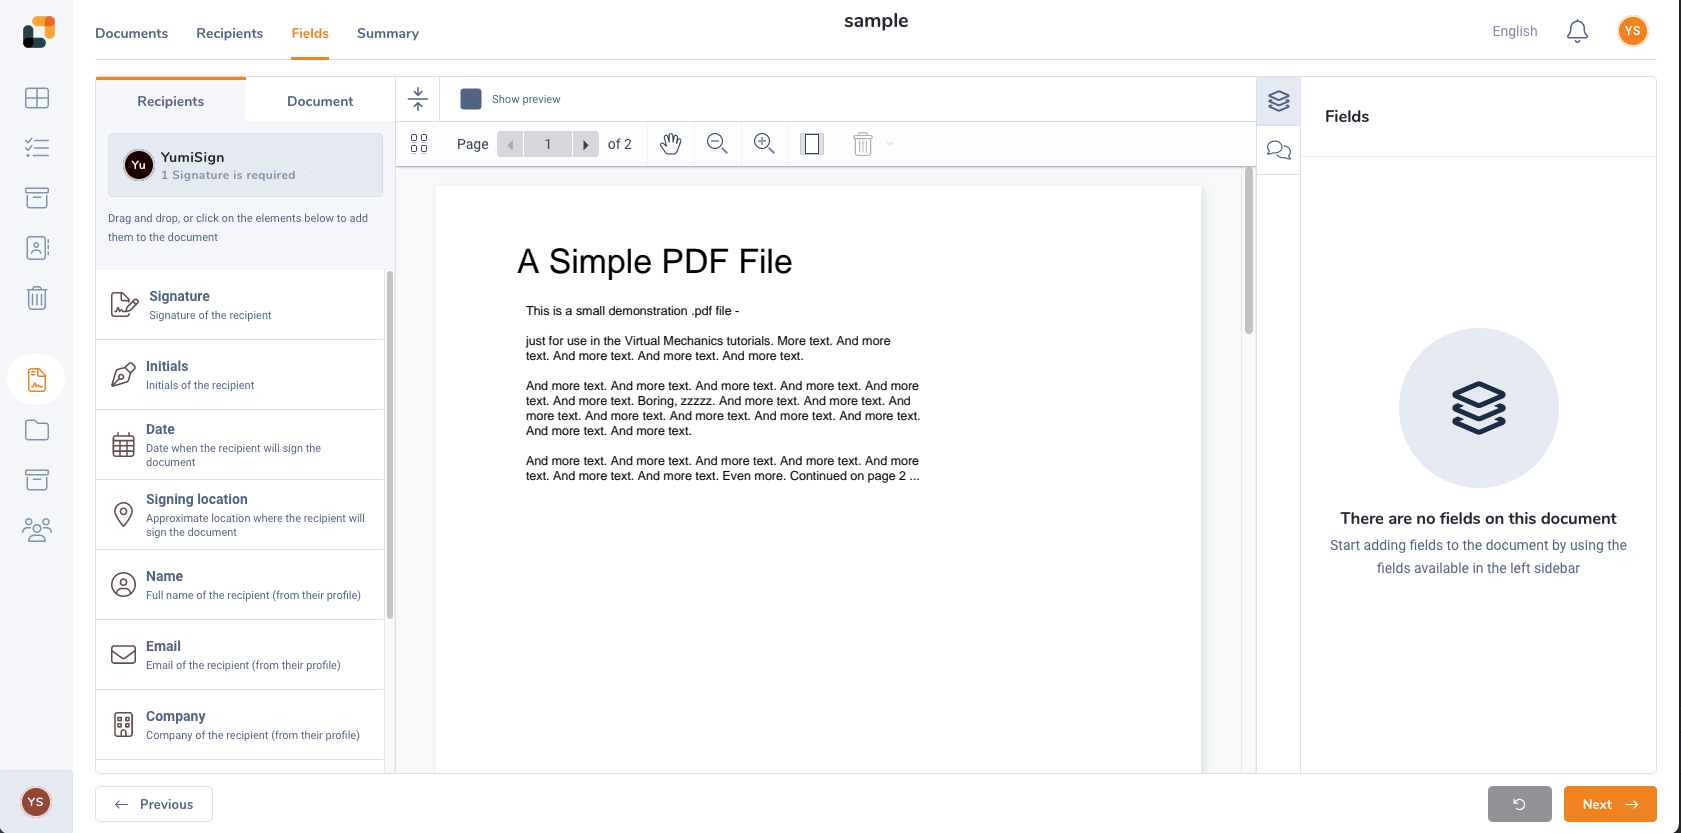
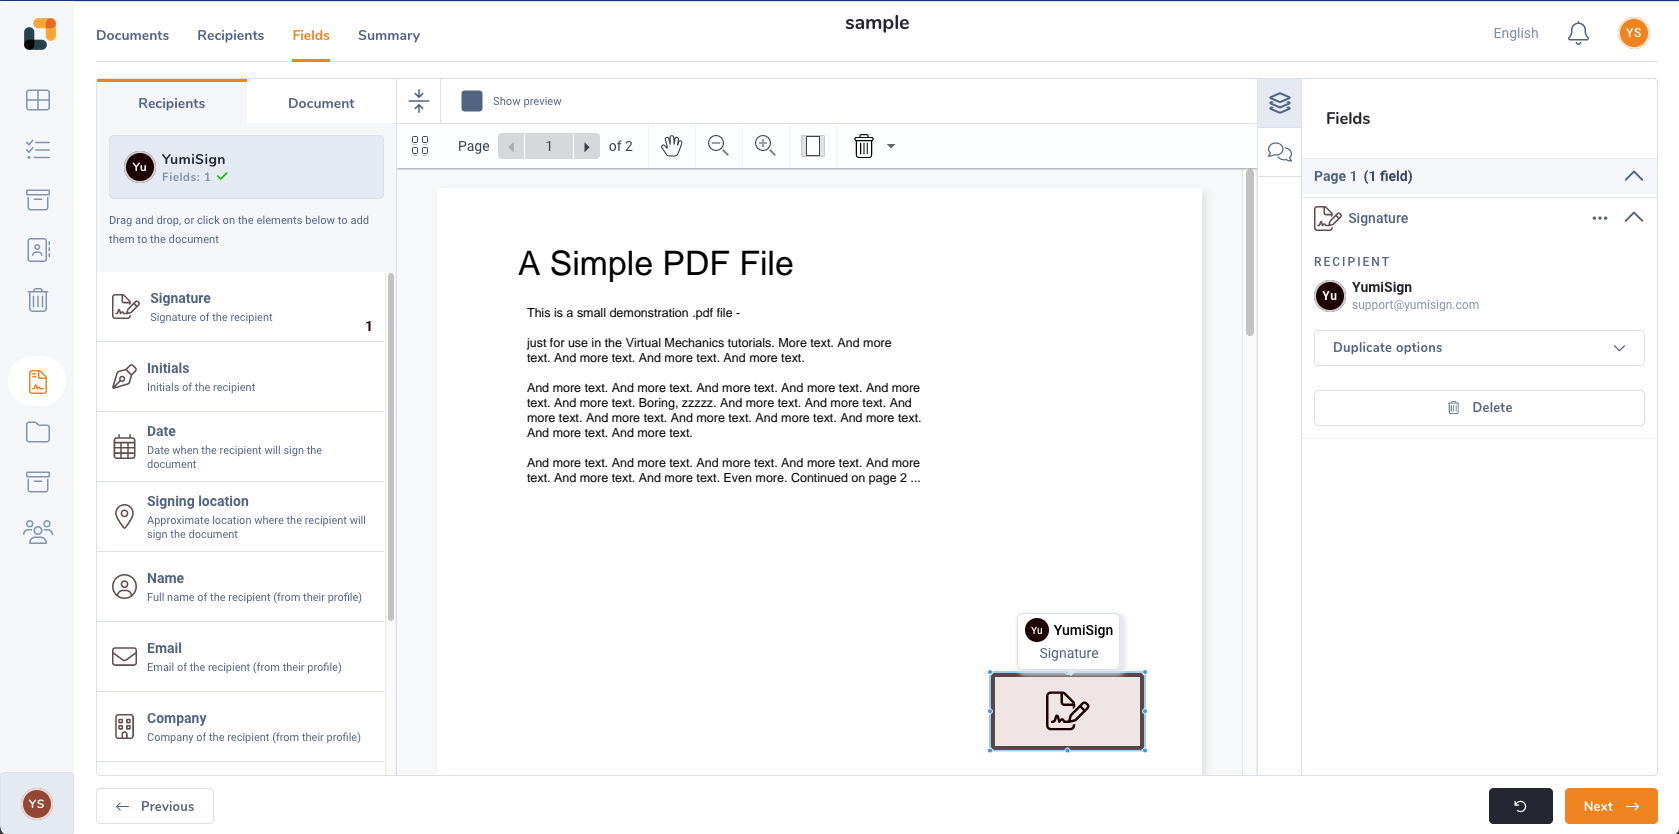
On the left column, you will find all the available fields. A signature field is mandatory, but you can add any field available you want.
Click on the "Signature" button to pop a field on your document. Then you can drag and drop to place it where you want:
After placing your fields, click on "next" to reach the final step:
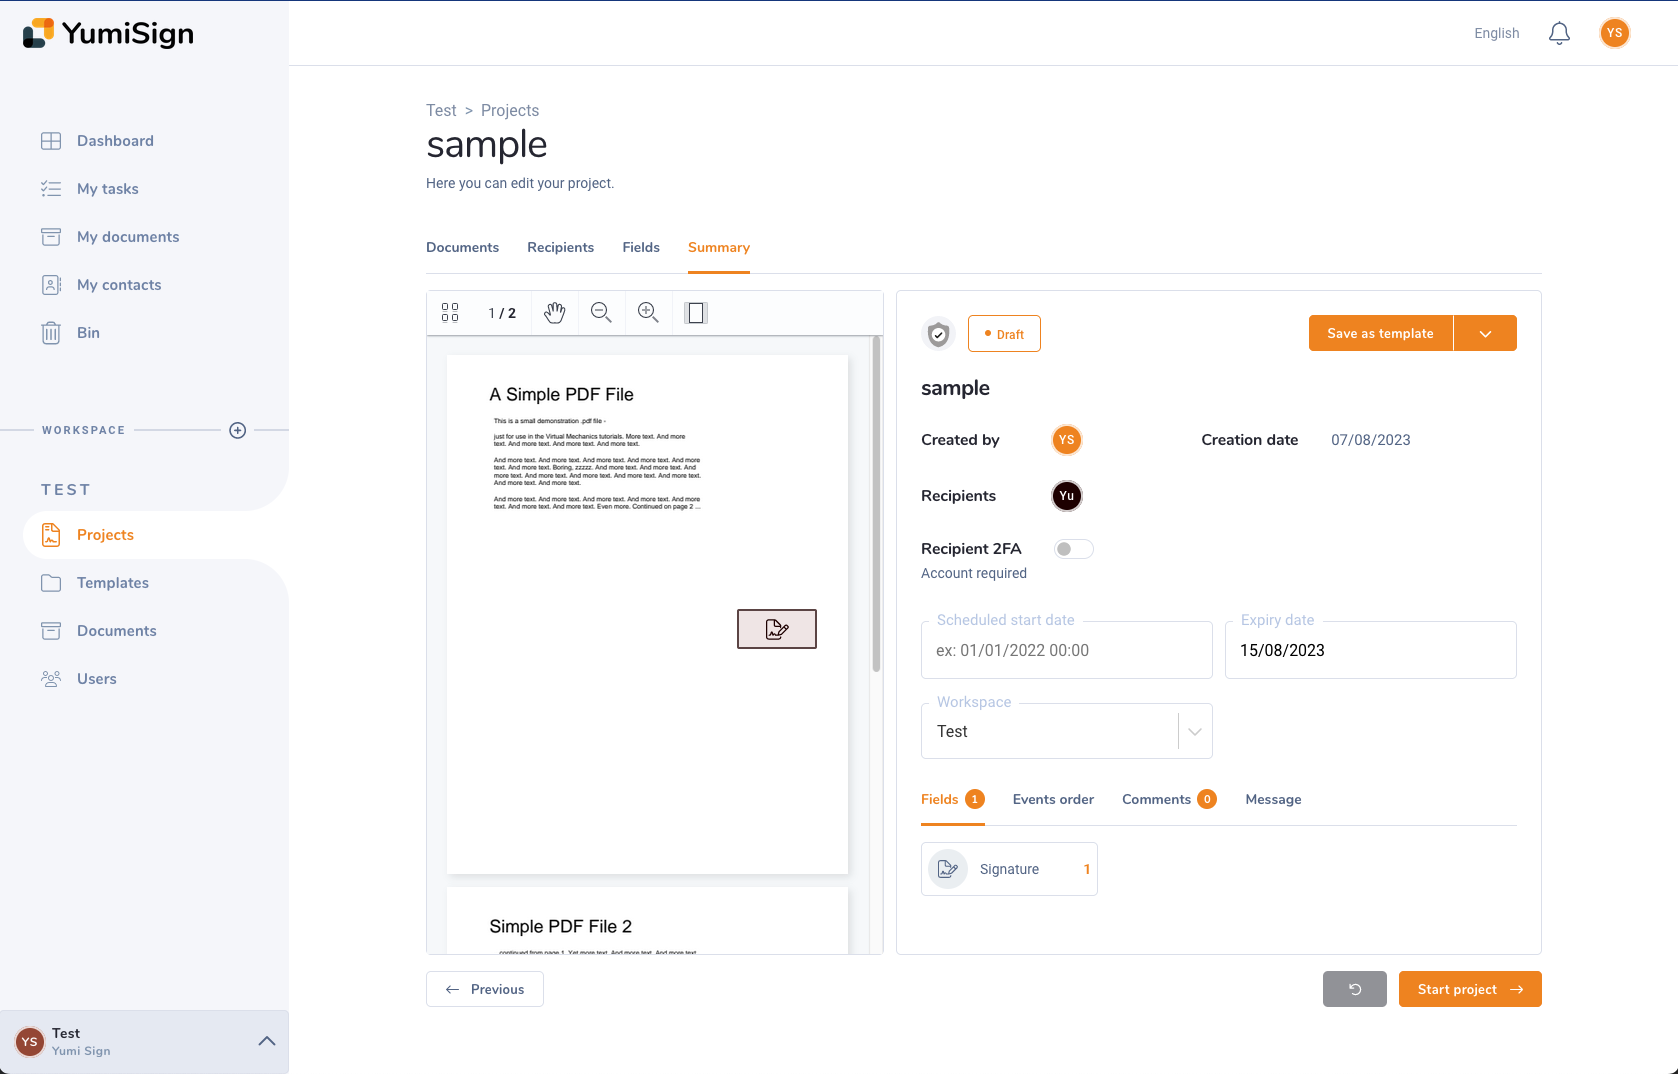
Here, you can see a summary of your project: the document, your recipients, the fields and other relevant information. This is the moment to double check that everything suits your needs.
When you are satisfied with your project, simply click on "Start project" to send it to your recipients. They will receive an email with the necessary instructions to create an account (if they wish to) and sign their document.