Setting up your profile on YumiSign allows you to personalize your account and manage your information effectively. Follow these steps to complete your profile setup.
Log in to Your Account
Visit www.yumisign.com and log in to your YumiSign account using your email address and password.
Access Your Profile Settings
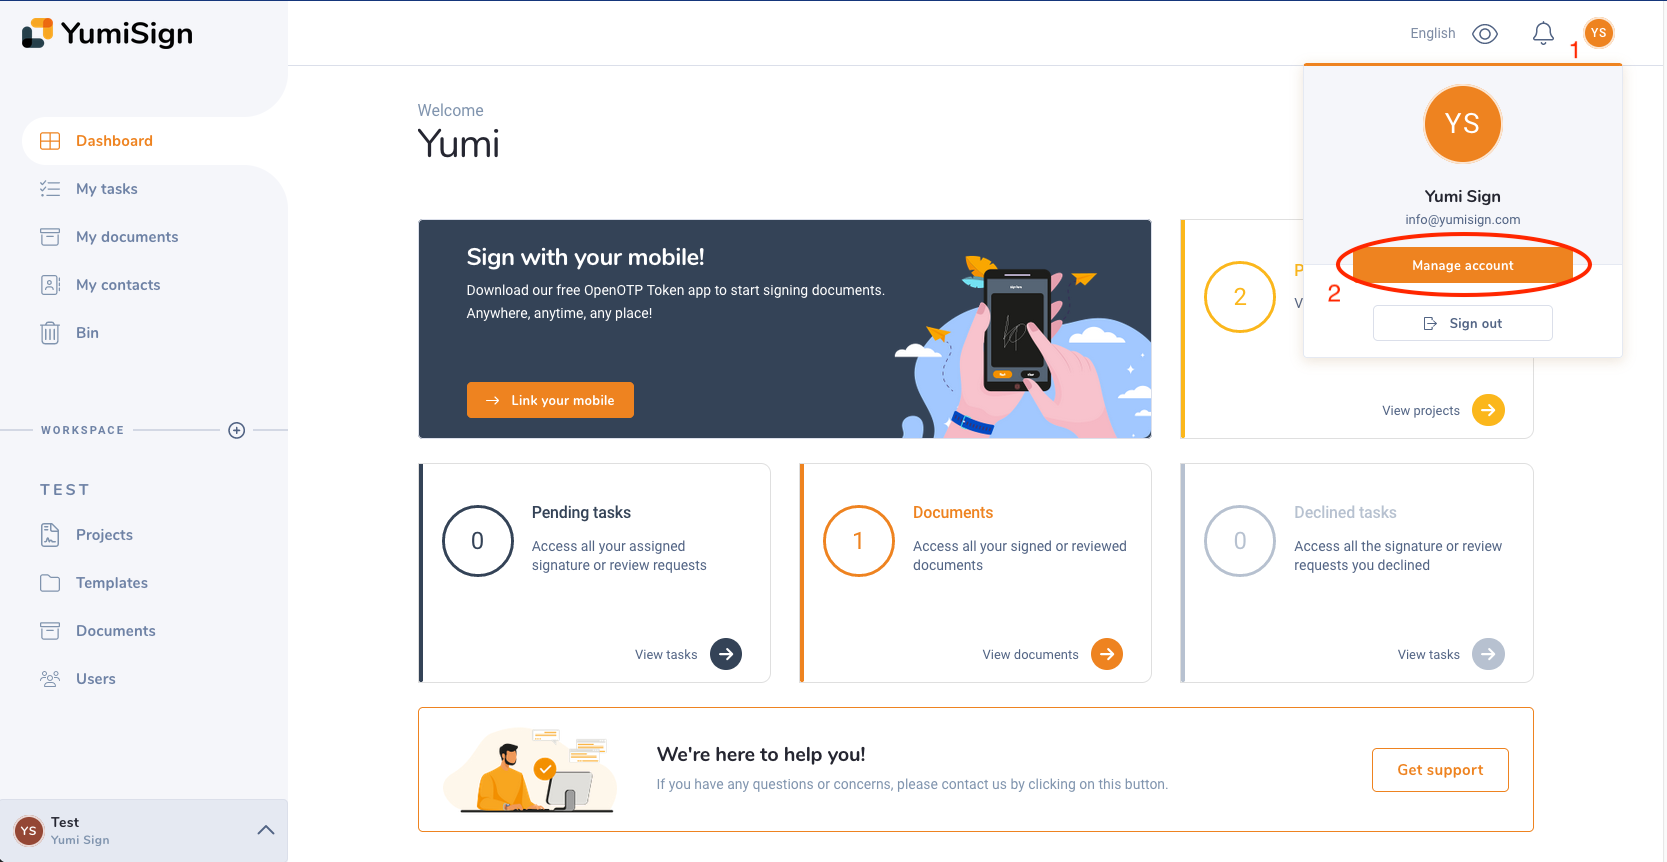
- Once you are logged in, click on your profile picture or avatar located at the top right corner of the dashboard.
- From the dropdown menu, select "Manage account".
Edit Your Profile Information
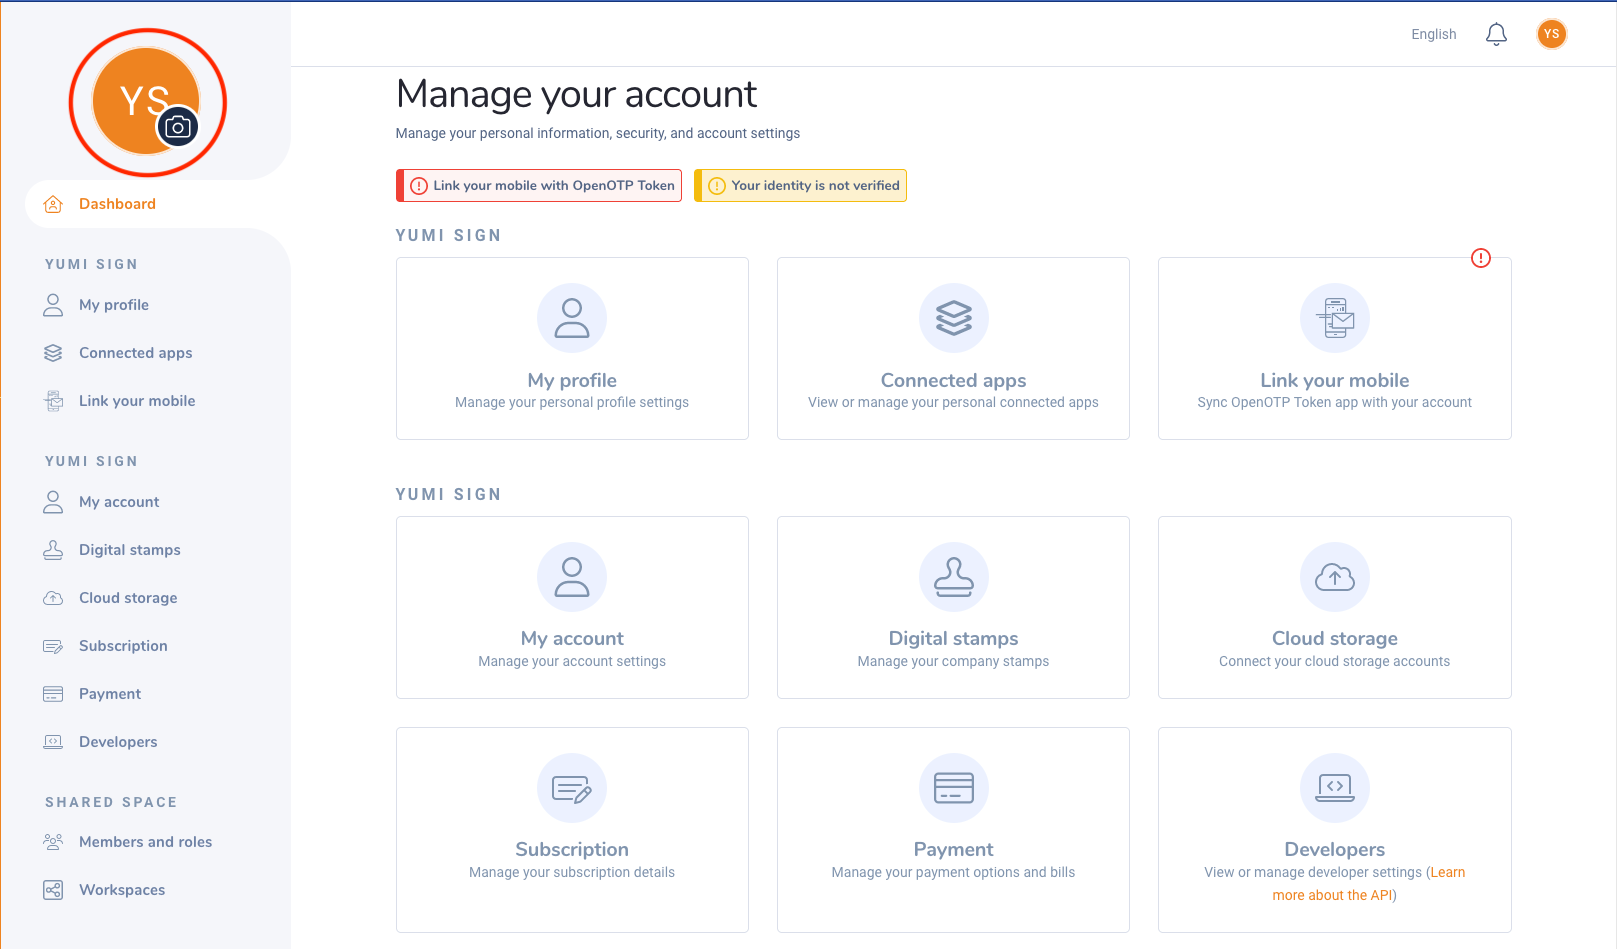
Profile Picture:
- To add or change your profile picture, click on the "Camera" icon next to your current avatar.
- Upload an image from your computer.
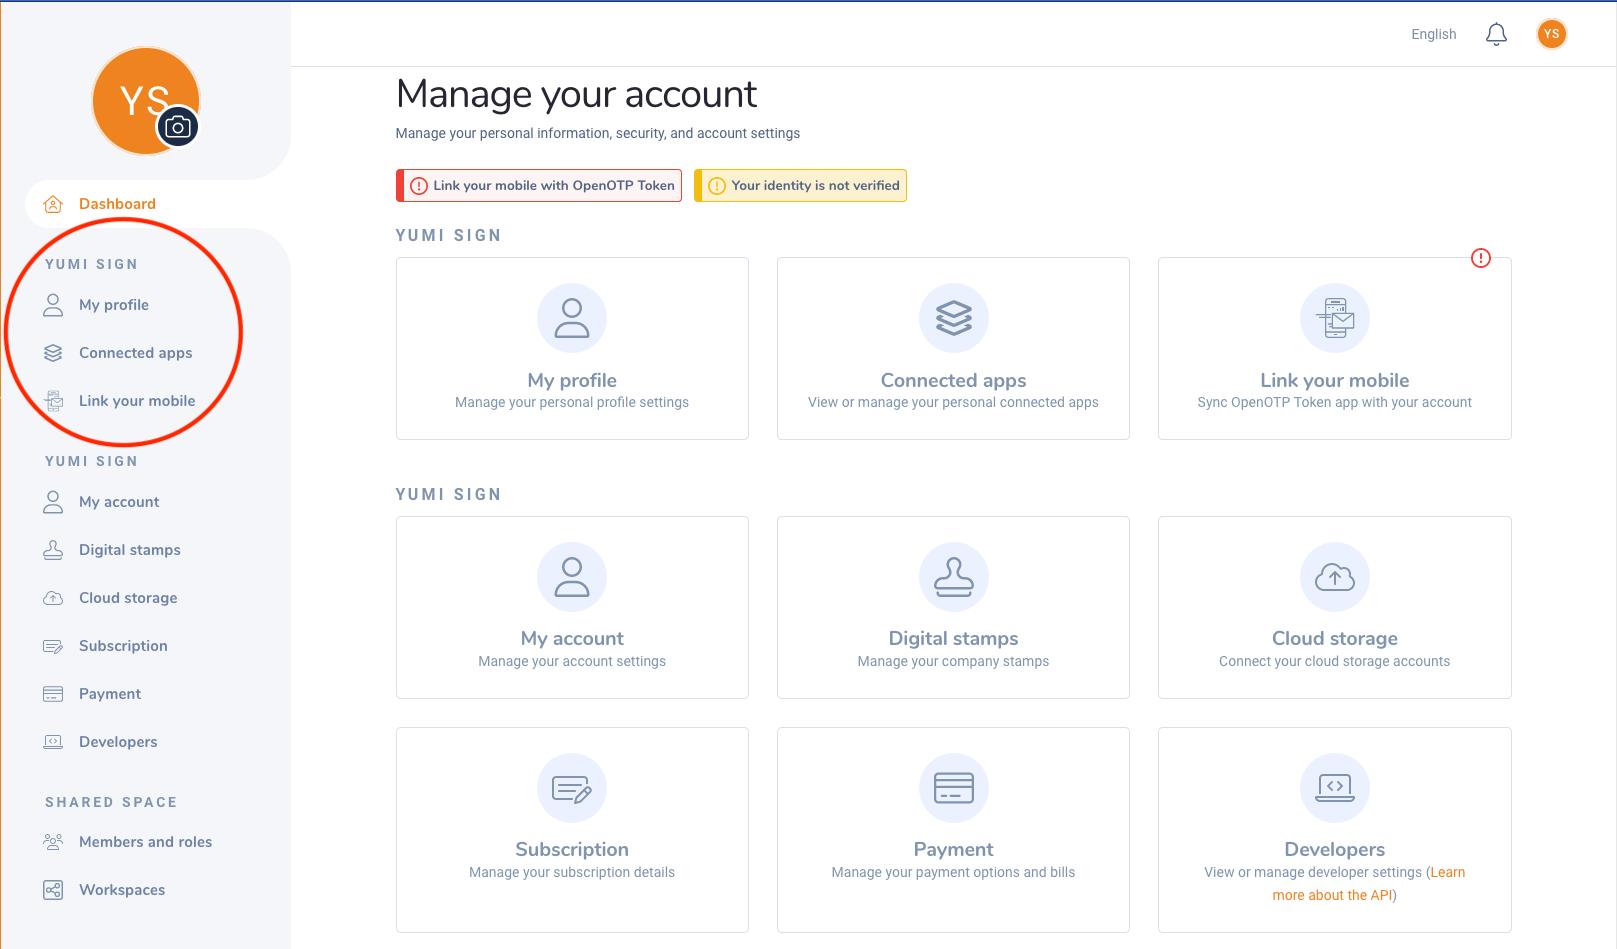
Profile section:
- My Profile: Update your profile information (name, company department, email, phone number), your KYC certification, your security settings and personal preferences.
- Connected apps: If you have linked your YumiSign account to external apps (like Zapier), you can manage those from this section.
- Link your mobile: Associate your mobile to the OpenOTP Mobile app in order to use it as a second factor authenticator.
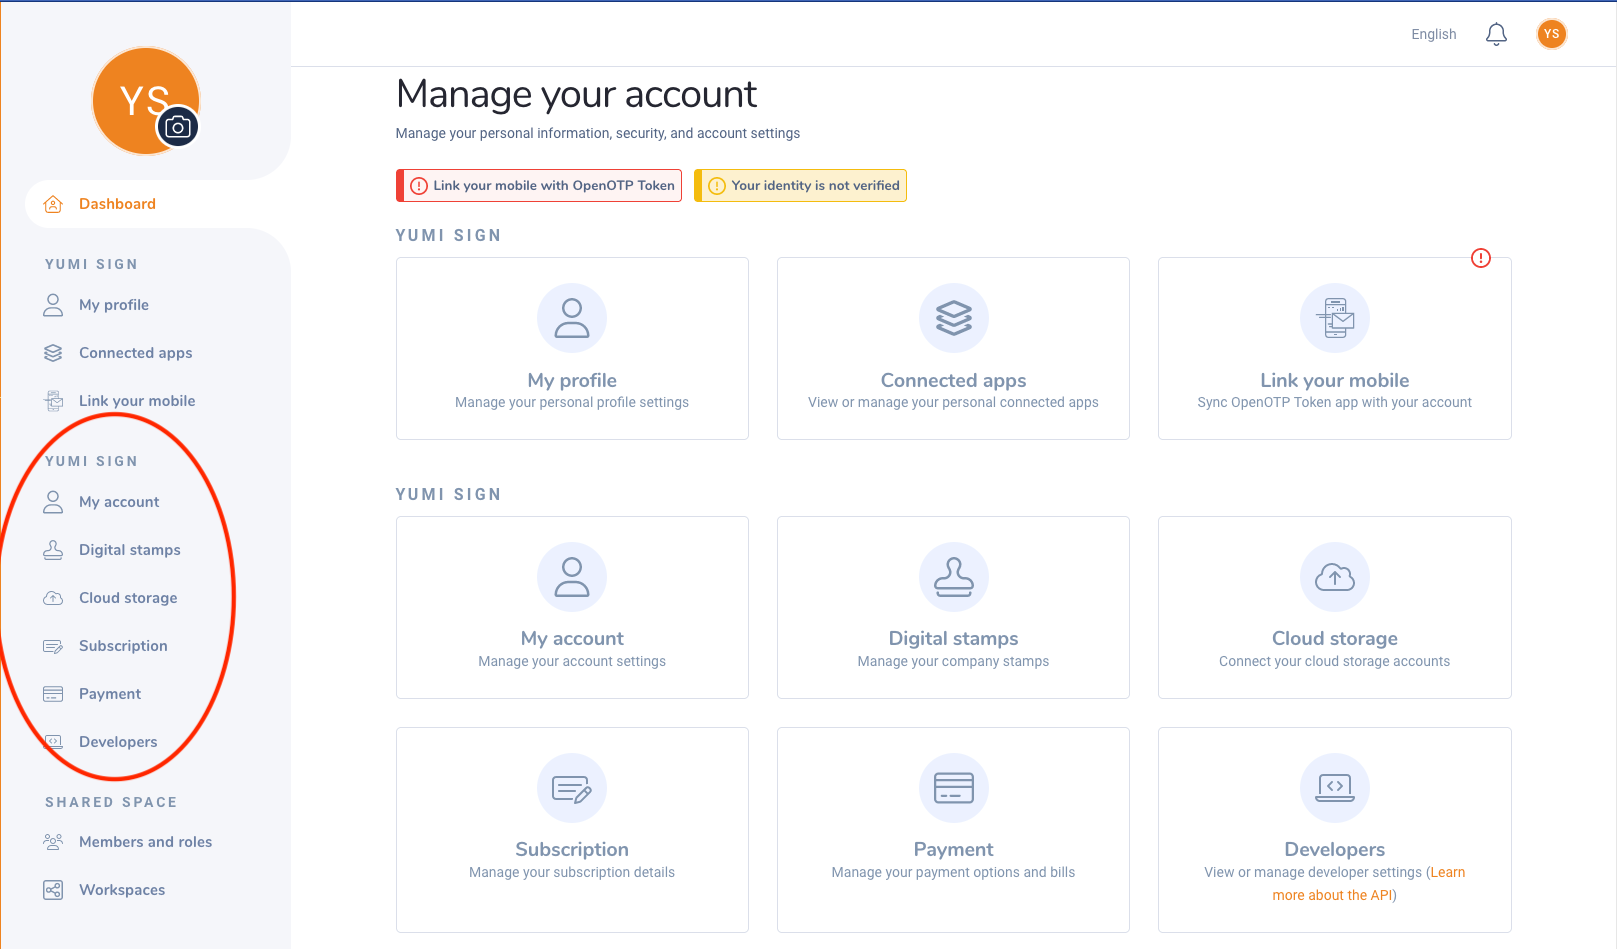
Company section:
- My account: Update your company information, your bin preferences or your domain protection.
- Digital stamps: Manage your company stamps that you can use during a signature process.
- Cloud storage: Associate and dissociate your account to cloud storage services. More information here.
- Subscription: Manage your current subscription, upgrade or downgrade your plan.
- Payment: Manage your payment information, see your last invoices
- Developers: Access your API keys, manage your integration apps, see your latest API activity.
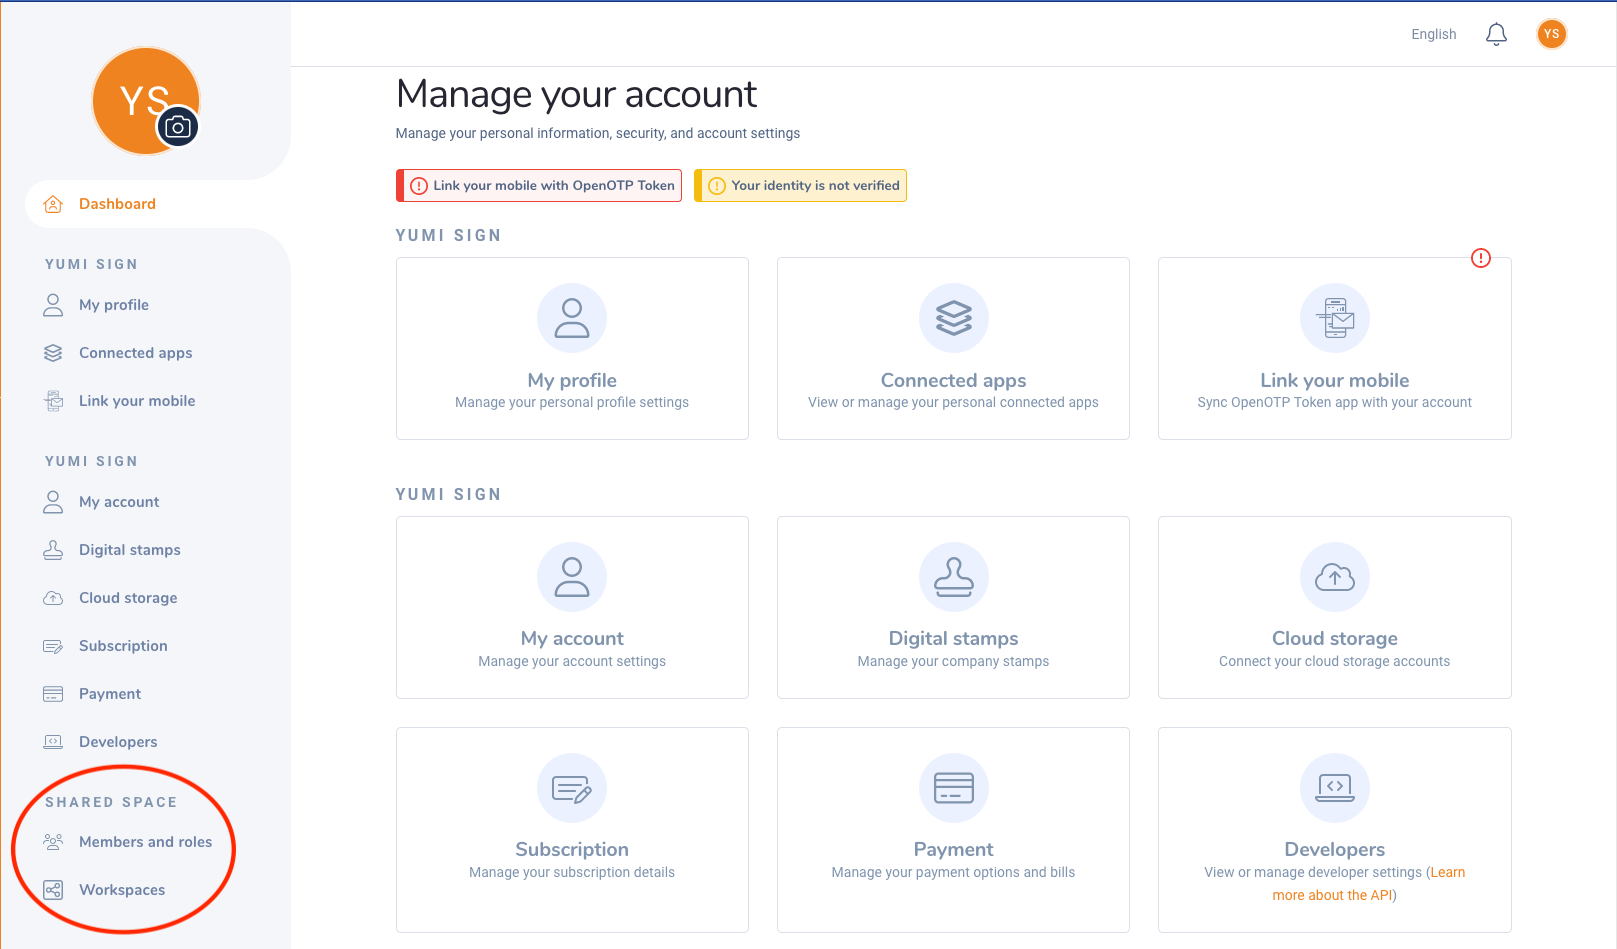
Shared space:
- Members and roles: Manage all your company members, assign roles, create custom roles tailored to your organization
- Workspaces: Manage your workspaces, access their dashboards, users.