
By default, all recipients in a project will sign at the same time. But sometimes, you may want your recipients to sign in a defined order. In that purpose, you can define steps in your project. By assigning your recipients to different steps, you can customize your signature workflow.
Creating a project with steps
First, following this guide, create a simple project and add some recipients. Click on "Add a step":
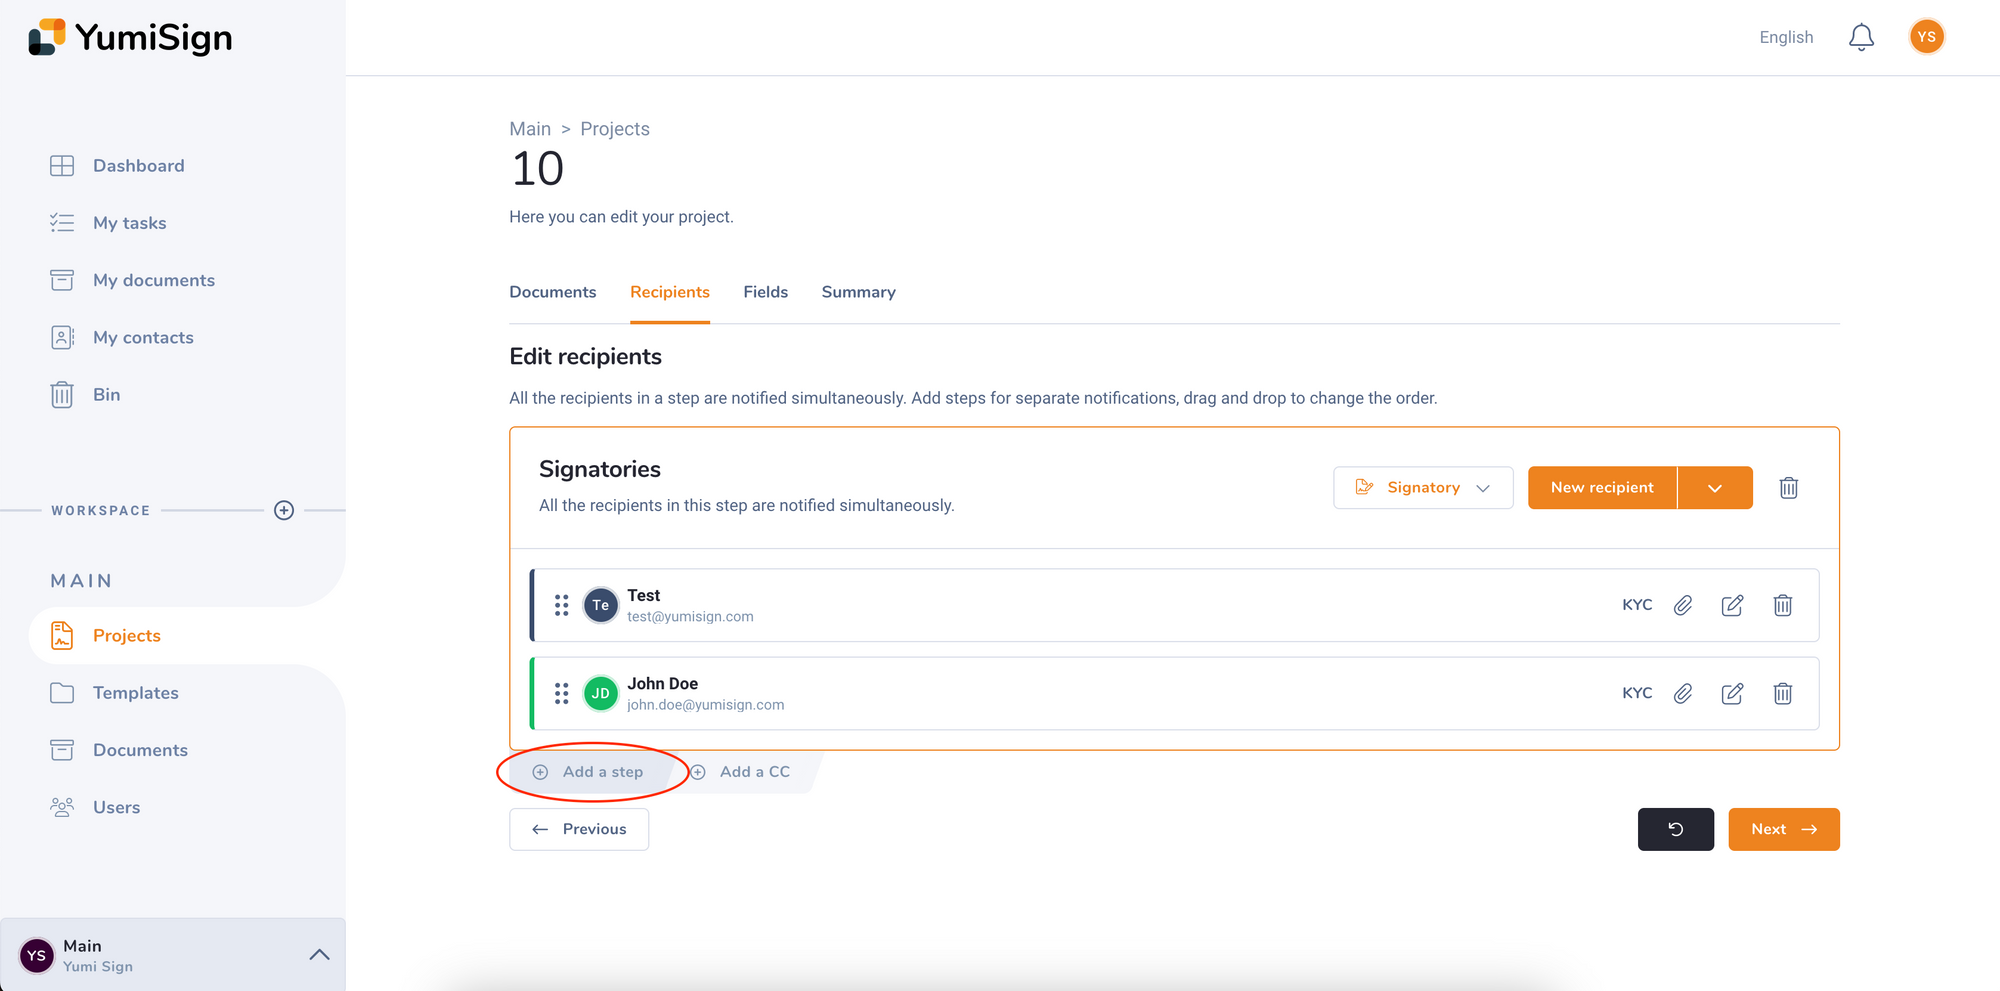
A second step appears. You can drag and drop an existing recipient or create a new one in this new step:
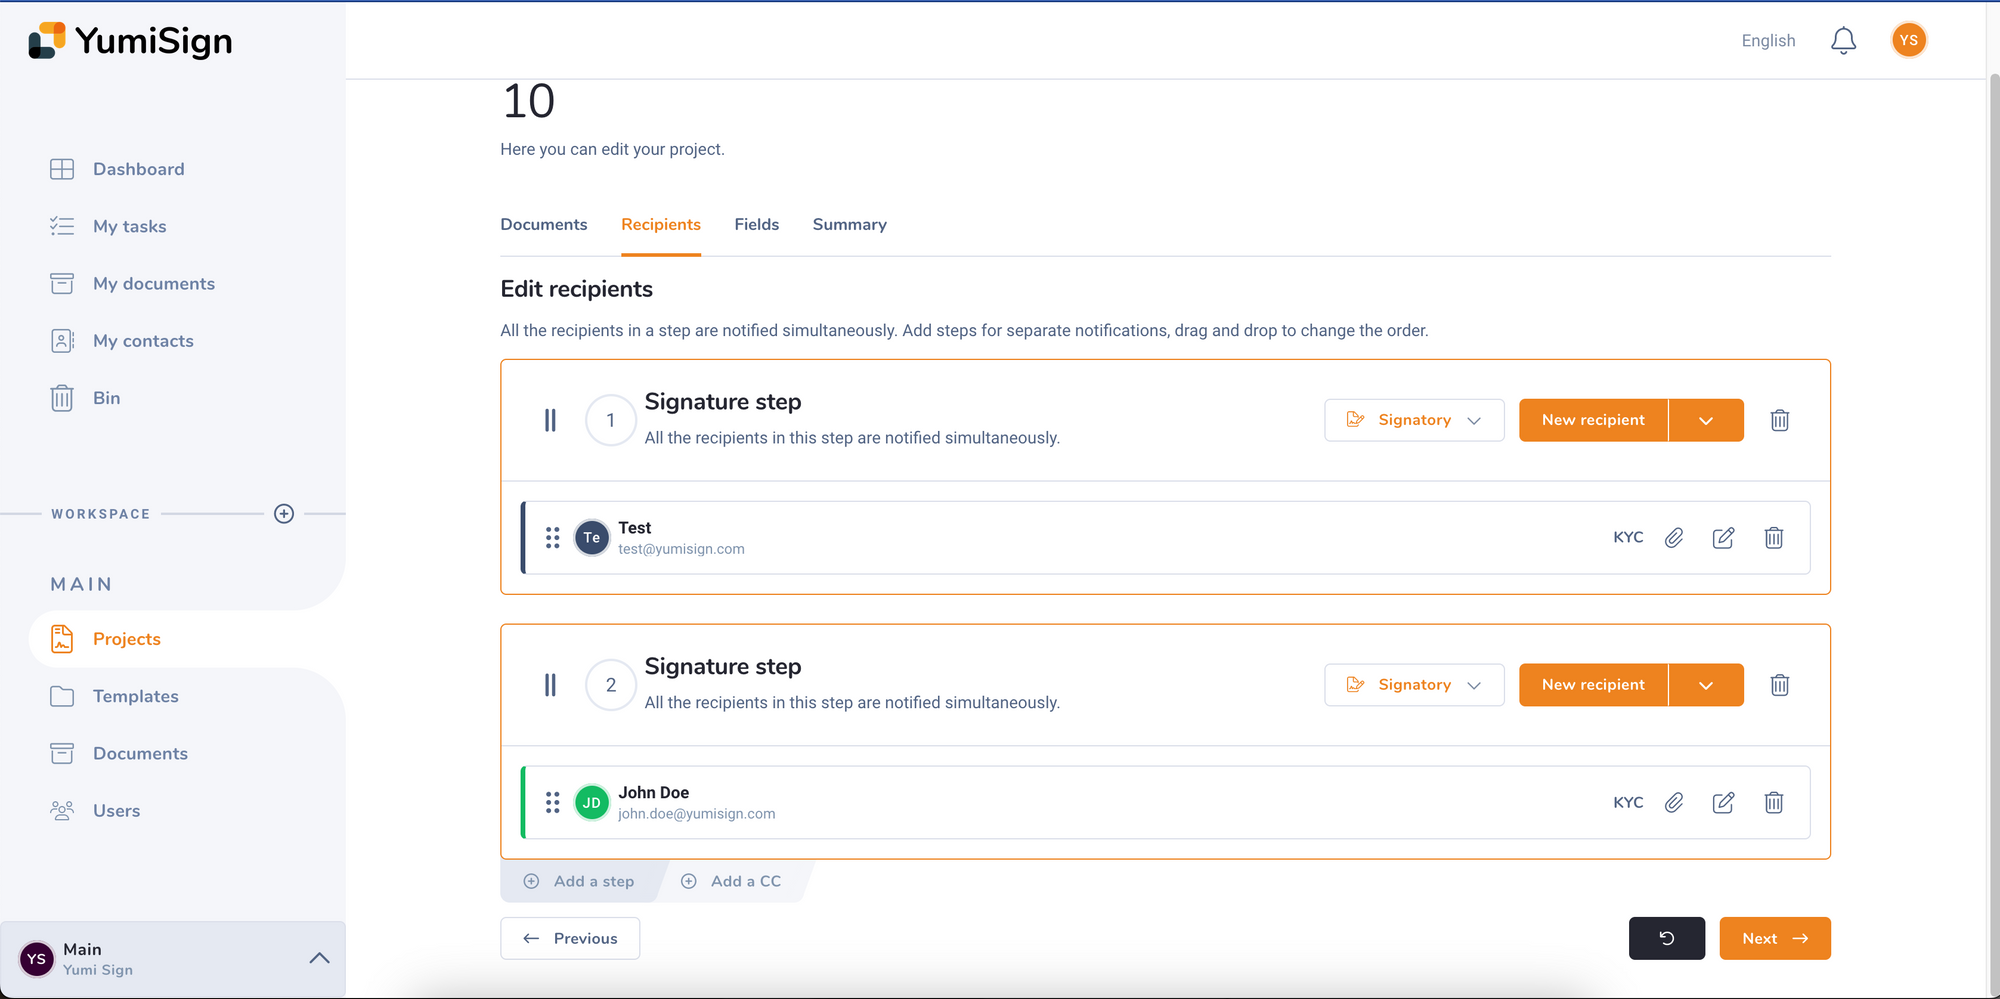
In this example, as soon as you start the project, "Test" will be notified about the project and they will find a new task in their account. At the same time, "John Doe" will not have a new task nor a notification.
As soon as "Test" has signed the document, the first step will end and the second one will start. Only at that point will "John Doe" be notified and get their new task.
What more can you do with this feature?
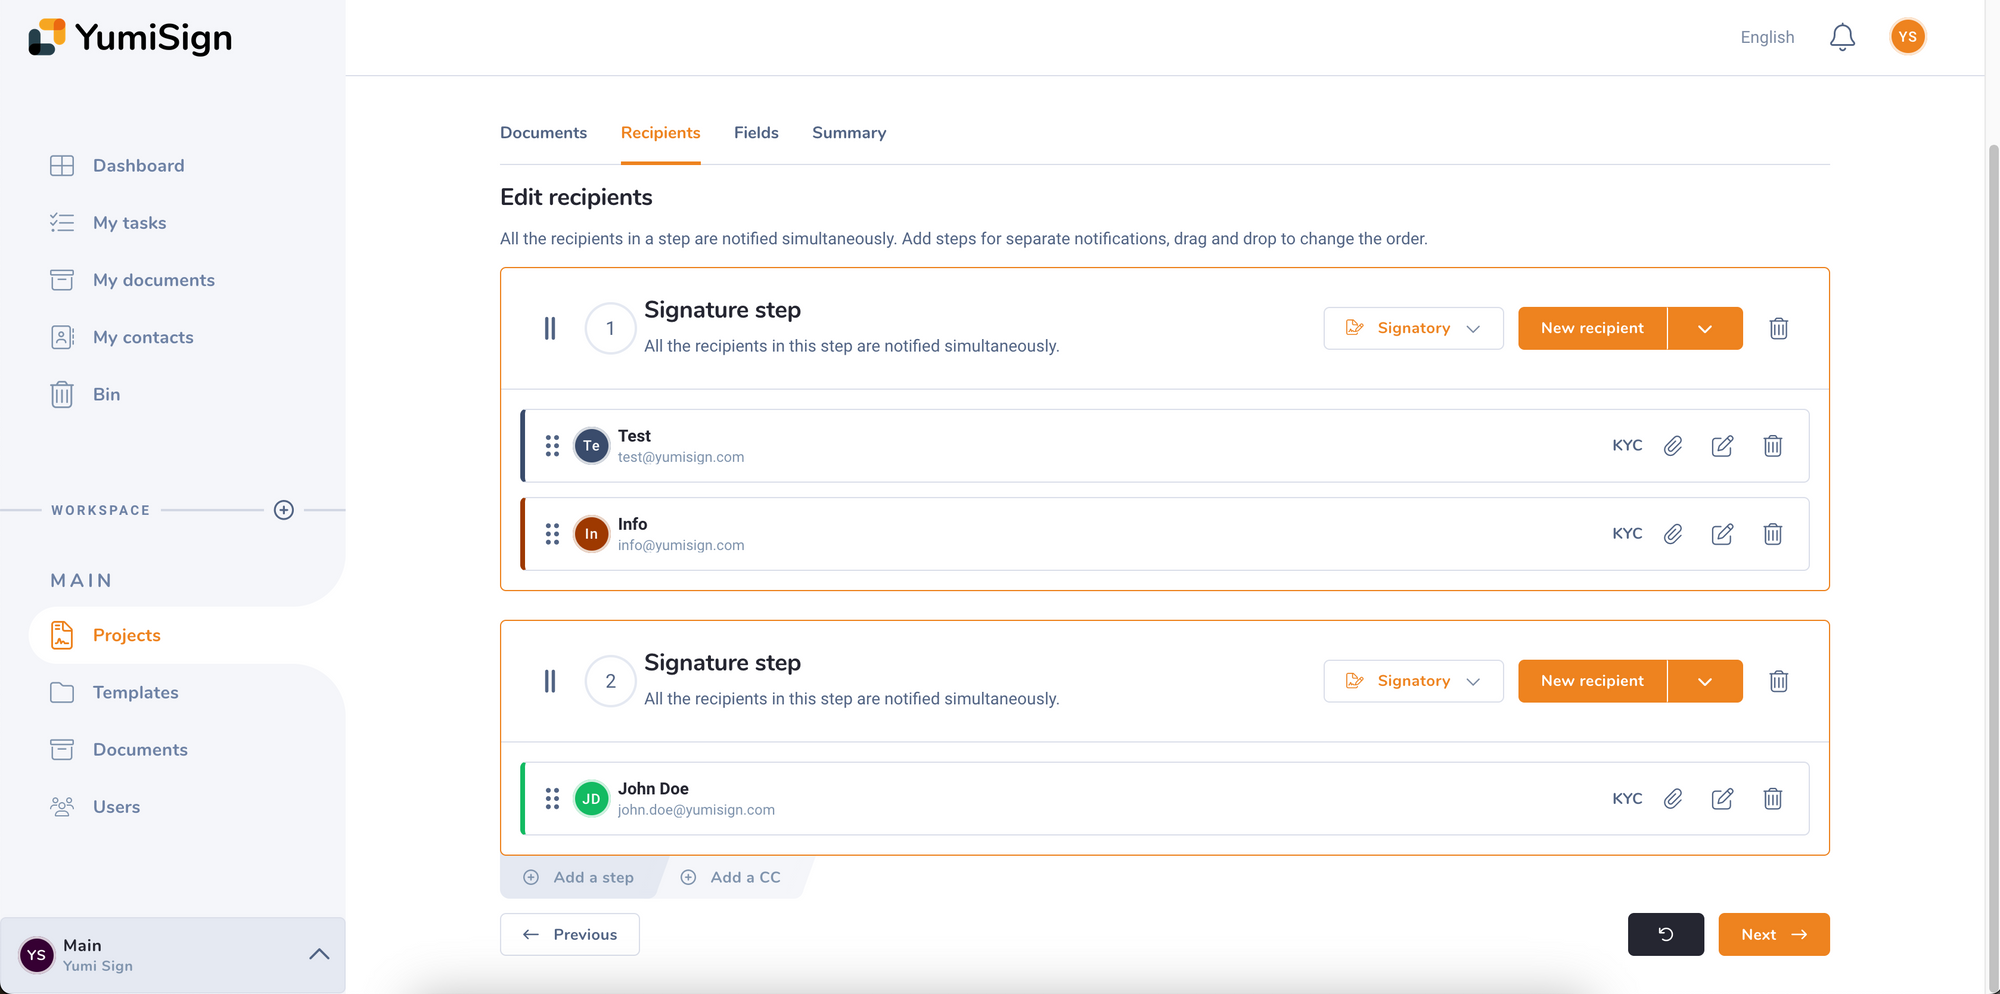
A step can have multiple recipients:
You can mix review steps and signature steps:
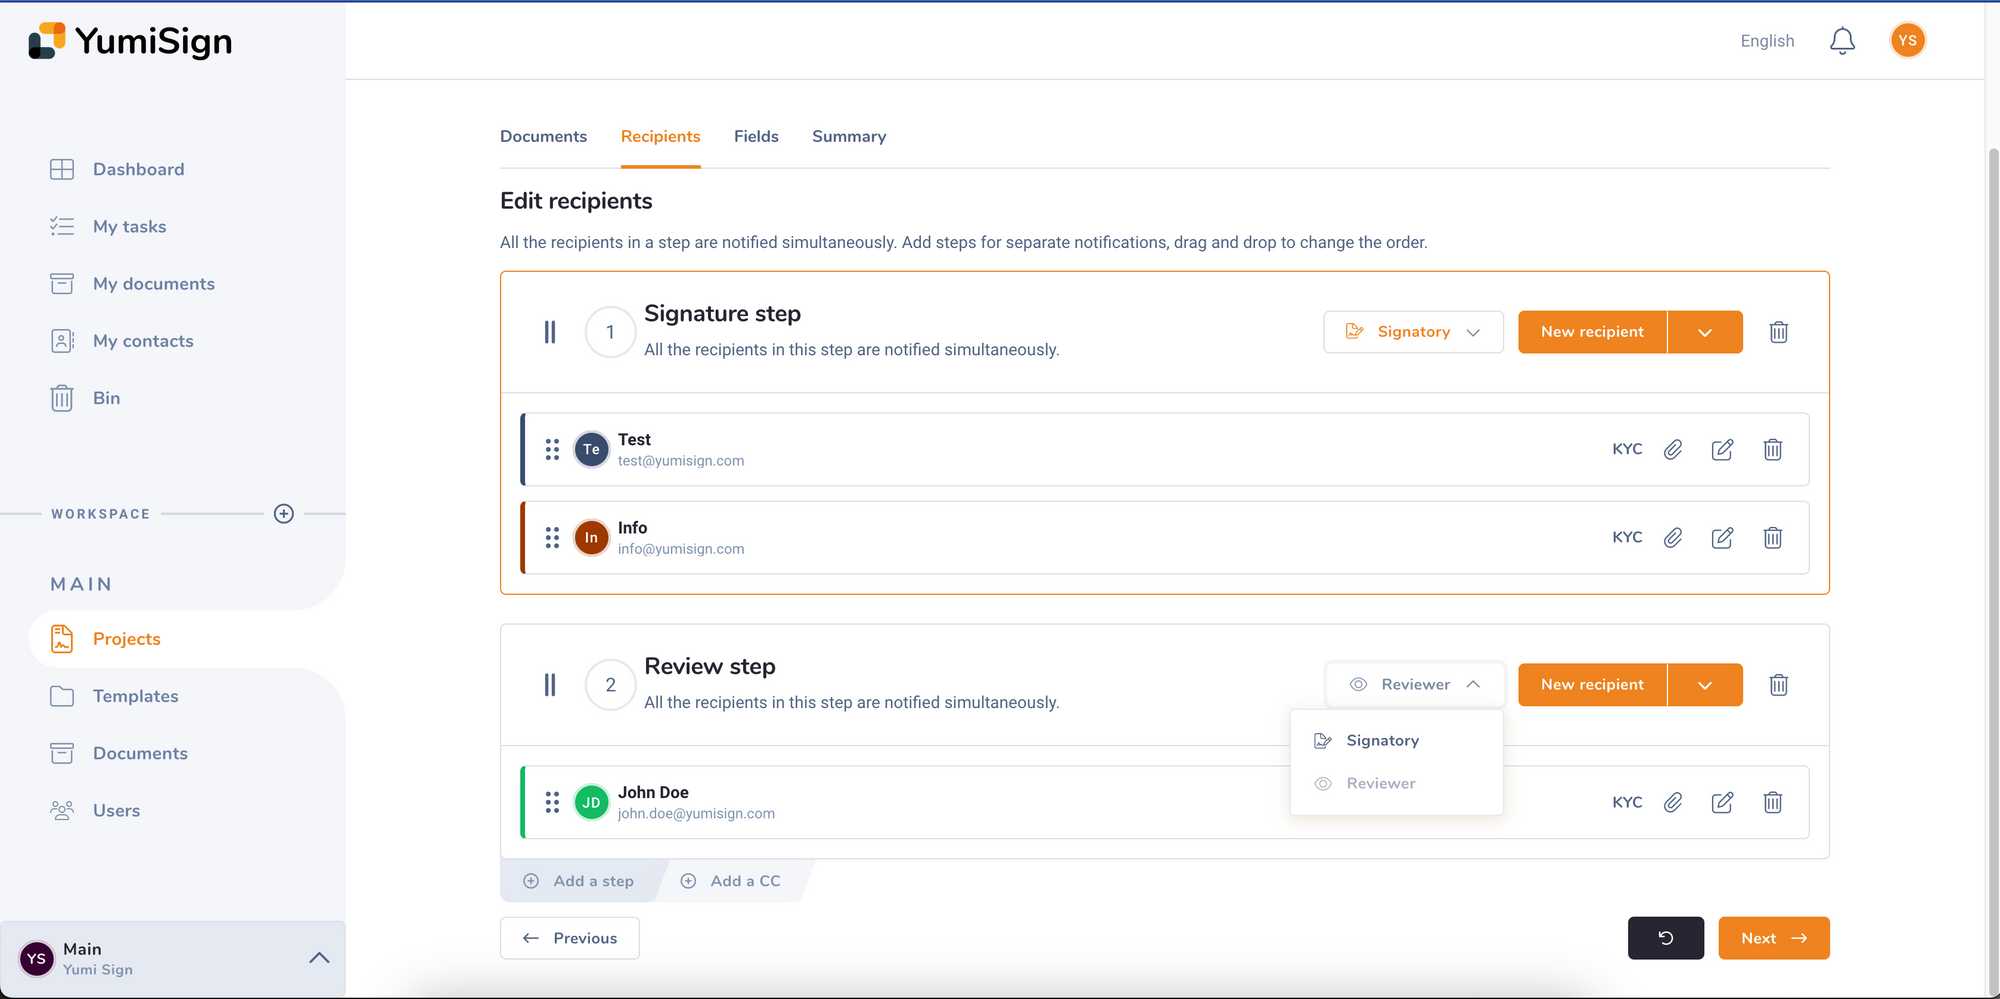
Reviewers are recipients that will approve or decline the document without signing it. See this page for more information.
All recipients in a step must be of the same type. You cannot have both reviewers and signatories in the same step. You can however have the same recipient in both a signatory step and a review step.